- Accounts
-
Shop
- Bundle / School Shop
- Personal Shop
-
SoundcheckPro
- Getting Started
- Session Mode
- Console Operation
-
The Patchbay
- Patchbay Overview
- Patchbay Controls
- Patchbay Troubleshooting
- External Rack Overview
- Audio Effects
- Education
- Advanced Functions
- Troubleshoot
- Xena Mixer
- Yamuka Mixer
- Maggie Mixer
- Zedd Mixer
- DG32 Digital Mixer
- SteeV88
- Audyssey Console
- Xena Web App
- EDU Portal
- Virtual Studio XR
Patchbay Controls
- Docs
- SoundcheckPro
- The Patchbay
- Patchbay Controls
Background
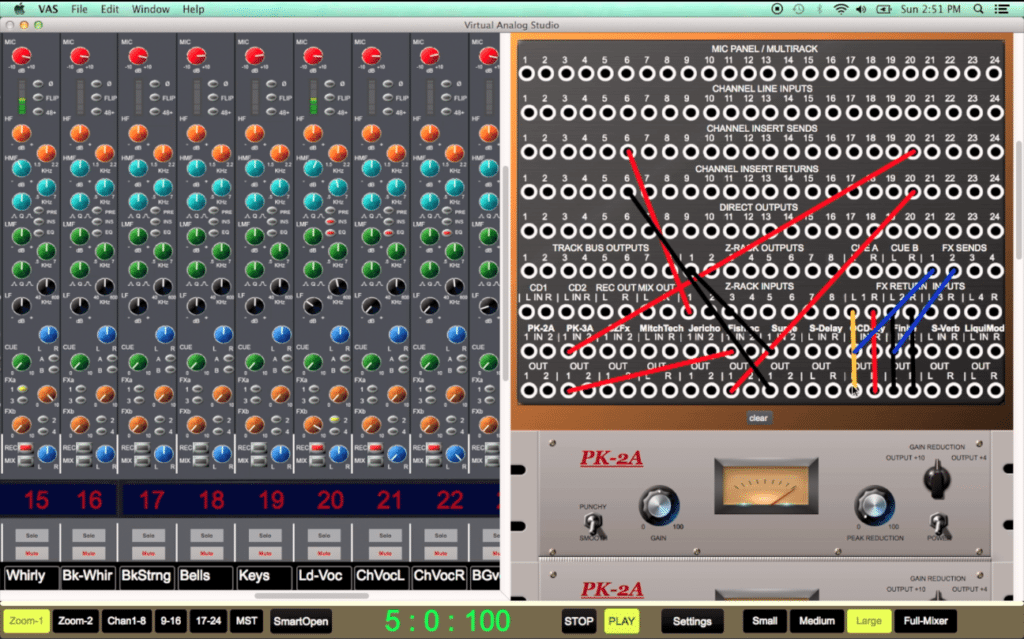
The patchbay allows an audio engineer to control signal flow throughout the environment.
For every Input or Output port on any of the hardware in the studio (mics, consoles, fx) it more likely reaches the patchbay before it reaches it’s final destination.

How to use
- Click an output and an input to make a connection
- Right+click or shift+click on a patchpoint to remove it’s connection
Patchpoint Breakdown
The patchbay could look intimidating at first but, there is order to the chaos.
A patchbay might be arranged by row, column or a combination of both.
Be careful for feedback loops! (article coming soon)
Typical patchpoints you might find:
- Microphone panel – (example: signal that comes from the performers booth/room).
- Channel Input – Entry point for signal to flow into the channels on the console.
- Insert Send – Allow audio from mid-way down the channelstrip to patch in an effect.
- Insert Return – The signal we sent in the section above typically comes back here.
- Channel Outputs – Tap the signal coming out of each channel on the mixer
- Audio Effects – Every audio effect that’s not built into the channels has its own input and out!
*Not complete list*
In this article