Sources Tab , Audio Files
Background
While SoundcheckPro aims to simulate the recording process, most times there wont be a band present. Therefore, the use of audio stems will beused to simulate the live performance. The audio files resemble performers playing into microphones whose signal will be feed into the console.
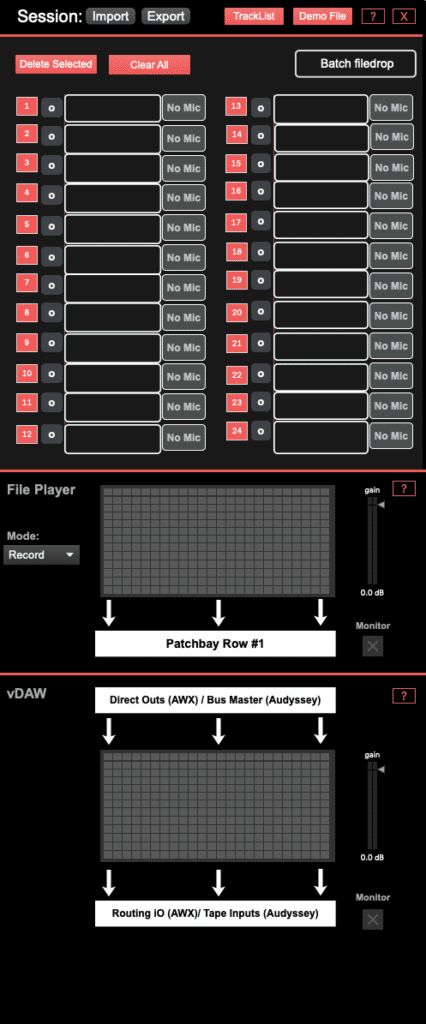
The sources feed the first row of the patchbay, “Mic Panel / File Player”. Each slot on the fileplayer corresponds to the patchpoint slot.
NOTE – SoundcheckPro does not include multitrack files! A single demo file is provided.
Recommend sources for multitrack stems:
- TELEFUNKEN MULTITRACK SESSIONS https://www.telefunken-elektroakustik.com/multitracks
- CAMBRIDGE MULTITRACKShttps://cambridge-mt.com/ms/mtk/
Steps to Load Audio Files
- Open the “Sources” tab
- Drag & drop audio files onto a channel slot or the “BatchFile Drop” slot.
- Alternatively, individual audio files can be selected in a finder window.
Batch Filedrop
Drag and drop a selection of files from the computer finder window. The files will spill out in the order of selection.
Individual Filedrop
Drag and drop a single file over a source slot.
“o” File Select
Similar to the individual file drop only this button will open a finder window to select a file without needed to drag and drop into SoundcheckPro.
Deleting Audio Files
There are several ways to remove files from the sources:
- Select a source by clicking the source number then, delete selected
- Clear All
Troubleshooting
A set of meters help visualize the signal output of the sources. Preview the output directly by engaging the MONITOR toggle. Be sure to disable this toggle when you’re ready to start mixing.
If audio playback does not work as expected, it is worth investigating your audio settings to check the buffer options.
Metering & Monitor
A set of meters help visualize the signal output of the sources. Preview the output directly by engaging the MONITOR toggle. Be sure to disable this toggle when you’re ready to start mixing.
File Player Meter
This meter is the direct output of the RAW audio files. It’s volume cannot be adjusted, if the meter is hitting the red, it is clipping at the source. Gain staging of the console levels can be adjusted accordingly.
The “Mode” feature only works for the Audyssey Console. It determines whether sources for the Mic-Inputs or the Tape Inputs of the console.
vDAW Meter
This meter is the direct output of the AWX Channelstrips or the Audyssey Group Busses (depending on the console used). The indicators above and below the meters signify to and from where signals are flowing.
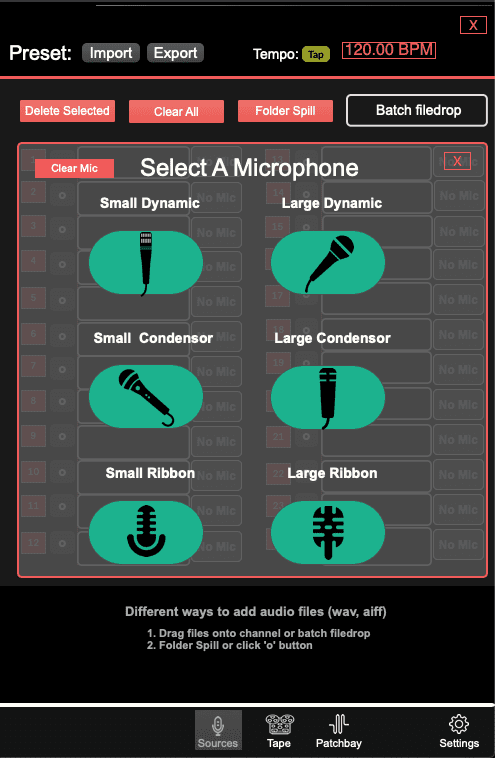
Microphone Selection
Each source can have a microphone associated for visualization purposes.
These microphones have no impact on the sound.
Microphone types:
- Small & Large Dynamic
- Small & Large Condenser
- Tube
- Ribbon
Expect there to be additional features in future updates that will include more mic-types, polar patterns and phantom powered required mics.