Setting Mixer Levels
Introduction
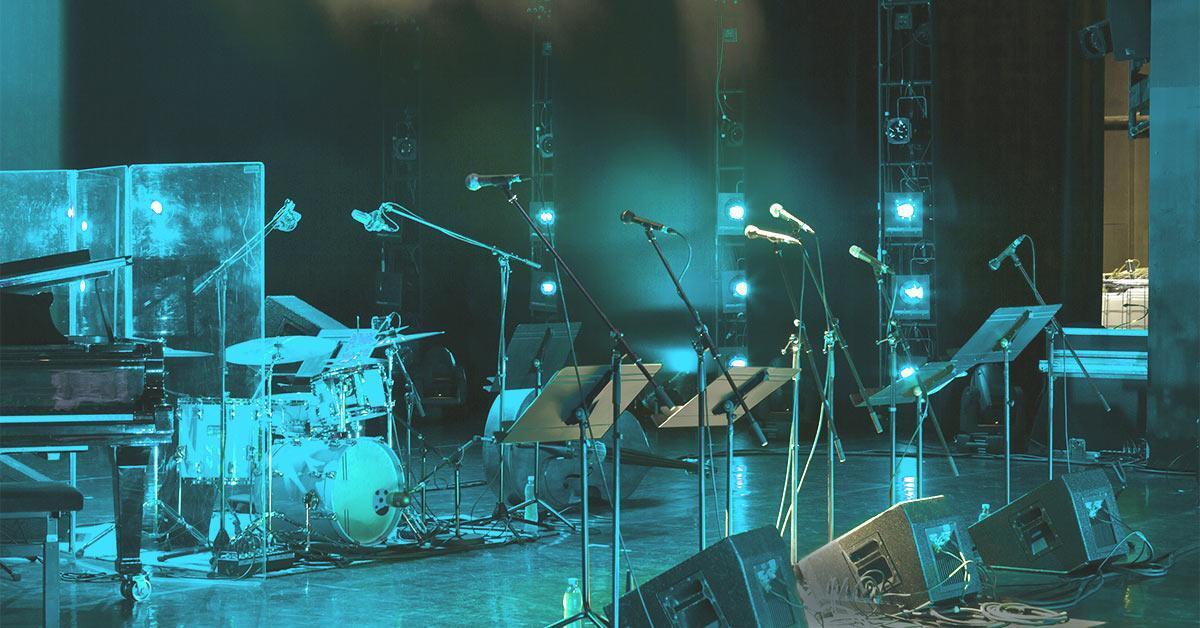
The microphones are set up and the band is already performing. Following the source signals, we’ll analyze the necessary tasks to bring sound into the mixer through the speakers.
This scenario is a timely process that needs to be set up to capture and record the performance.
The more practice the more efficient and timely one will be.
Setting Mixer Input Levels
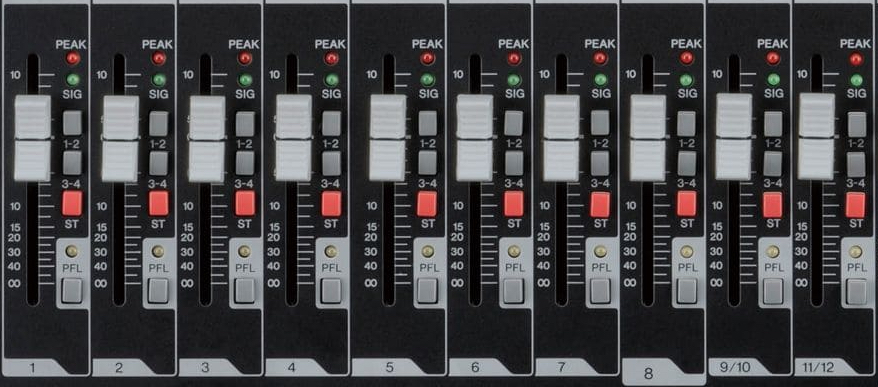
Getting sound into the mixer is pretty standard procedure. A similar series of actions must be performed in order to hear sound. We created a checklist for working with mixers of different sizes.
Compact
- Input Gain*
- Channel Fader (unity)*
- Master Fader (unity)*
Mid-Sized
- Solo PFL*
- Input Gain*
- Channel Fader
- Mix Bus Assign
- Master Fader
- Monitor Volume
Large Format
- Solo PFL*
- Input Gain*
- Channel Fader
- Mix Bus Assign
- Master Fader
- Monitor Source Select
- Monitor Volume

Pre-Considerations
- What kind of meters are available on the mixer?
- Is there a solo button on each channel?
- Do we need to assign channels to the main stereo bus?
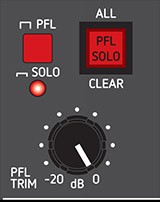
Solo – Pre Fader Listen (PFL)
It is good practice to use the channels SOLO if there is one present. This will isolate the signal and in most cases override the main meters to read the channel signal directly. It also gives us assurance that whatever is being measured is only what is passing through the channel soloed. We could adjust the incoming signal or any of processes made prior to the channel.
“Pre Fader Listen” – Observes the signal before the channel fader.
The main mix meters will display the level of signal controlled by the input gain.
For mixers without PFL or Solo buttons, see the video at the end of the lesson.
Measuring the Levels
“Meters” help us read the level of audio signal coming into mixer. it is best to first identify the shortest path between the input of the channel and the first available meter. Certain mixers might include meters on every channel. Generally there will be a proper meter in the master section.
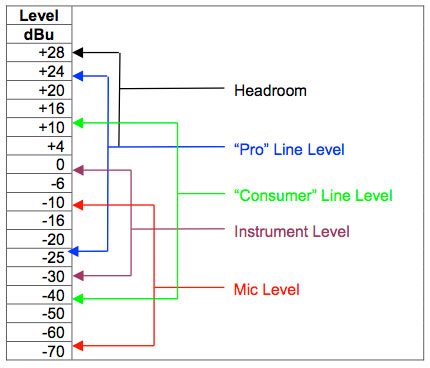
It is important to distinguish the type of signal we are measuring. Whether it is Mic or Line level will play a significant role. Mic signals are significantly lower than Line level.

The Steps
1. PFL Solo
“Pre Fader Listen” – Observes the signal before the channel fader.
The main mix meters will display the level of signal controlled by the input gain.
This step is case by case. Depending if there are meters on each channel.
For mixers without PFL or Solo buttons, see the video at the end of the lesson.
2. Channel Input Gain
The amount of signal entering the channel strip is determined by the input gain knob.
Being the first gain stage, the channel input gain could be seen as the most important. Here is where the initial strength of the signal is set as it enters the mixer. With the knob turned down, the signal enters the mixer at it’s weakest or not at all.
If the input gain is improperly set, unwanted artifacts could be introduced to the signal, such as clipping.
- Keeping an eye on the meter levels, raise the input gain knob.
- It is suggested to aim for 0db.
Preparing to Mix
3. Channel Fader
Controls the volume of the signal exiting the channelstrip. The fader is used more for blending sounds so long as the input gain is set properly.
- Set the fader to -6db.
This will leave room to boost desired sounds later.
4. Assign to Main Mix
Some mixers might not include this step as it would be hardwired.
A channel’s output destination is not immediately set. There will typically be a button to assign the channel to a main stereo bus (mix). Different mixers offer different terminologies for these assignments.
- Assign the channel to the main mix
5. Master Fader
Controls the volume of the main stereo bus as it is sent to the main stereo output of the mixer.
- Set the master fader to 0db.
6. Monitor Source Section
Play the desired mix through a desired set of speakers or headphones. This allows us to listen to the main mix via a different output on the mixer independent of the main output.
- Assign the main mix to the monitor output
7. Monitor Source Section
The last step is to raise the volume being sent to the speakers that we use to listen. This won’t be the main output. Rather, it is a duplicate so that the volume doesn’t impact the main mix.
Video: Mixers without Solo or PFL
Conclusion
At this point there will be audible sound in the control room. There’s still more work to do as the artists don’t have headphone mixers and there’s a lot of mixing to do!