How to Capture Sound?
Introduction
Performance is the essence of a recording or live show. How do we capture sound and the performance so that it could be heard by listeners near and far at any time? There are several types of audio sources and tools used to capture sound.

Types of Sources
- Acoustic – instruments that generate sound without the use of electricity. Guitar ,Piano, Strings Horns
- Electric – instruments that could generate sound with the use of electricity. Keyboards, Electric Guitar, Samplers, Software Instruments
- Voice – spoken or singing by an individual or a group.
Microphones
Devices that convert air vibrations into an electric signal that can be used by the mixer. Microphones come in different types and might have different requirements to operate.

There are several considerations to make when selecting a microphone. Not every microphone is going to work best in every situation.
Pickup Pattern
Polar patterns, also called “pick-up patterns” distinguish the directional sensitivity of microphones. It gives the ability for the microphone to focus or reject sound that arrives from any angle in a 360 field.

When you point a microphone at a source, you expect that it would focus more on the direction the microphone is facing. However, you may wish to pickup sound in other directions. Some microphones only offer a fixed polar pattern. There are microphones that can change polar patterns by a switch.

Frequency Response
Frequency response describes how a microphone will respond to frequencies that it picks up. Think of it like the natural EQ of the microphone.

Phantom Power
Some microphones require external power. Many mixers will offer a switch labelled, “Phantom Power” or “48v”. This will send electrical power from the mixer to the microphone. Without it, a microphone might not operate. Beware! Sending phantom power to the wrong microphone or any destination could damage it!


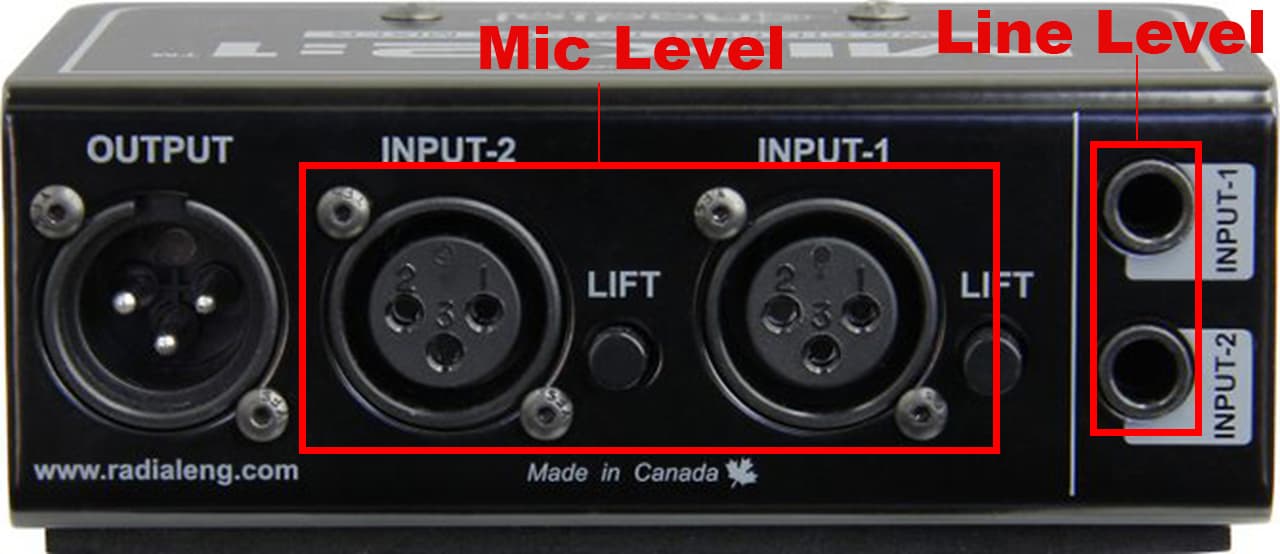
Mic vs Line Signals
Let’s review the difference between mic and line signals. A line-level signal is approximately one volt, or about 1,000 times as strong as a mic-level signal, so the two do not ordinarily use the same input. The mic signal should be first routed to a “pre-amp” in order to boost up to line level for a healthy level.
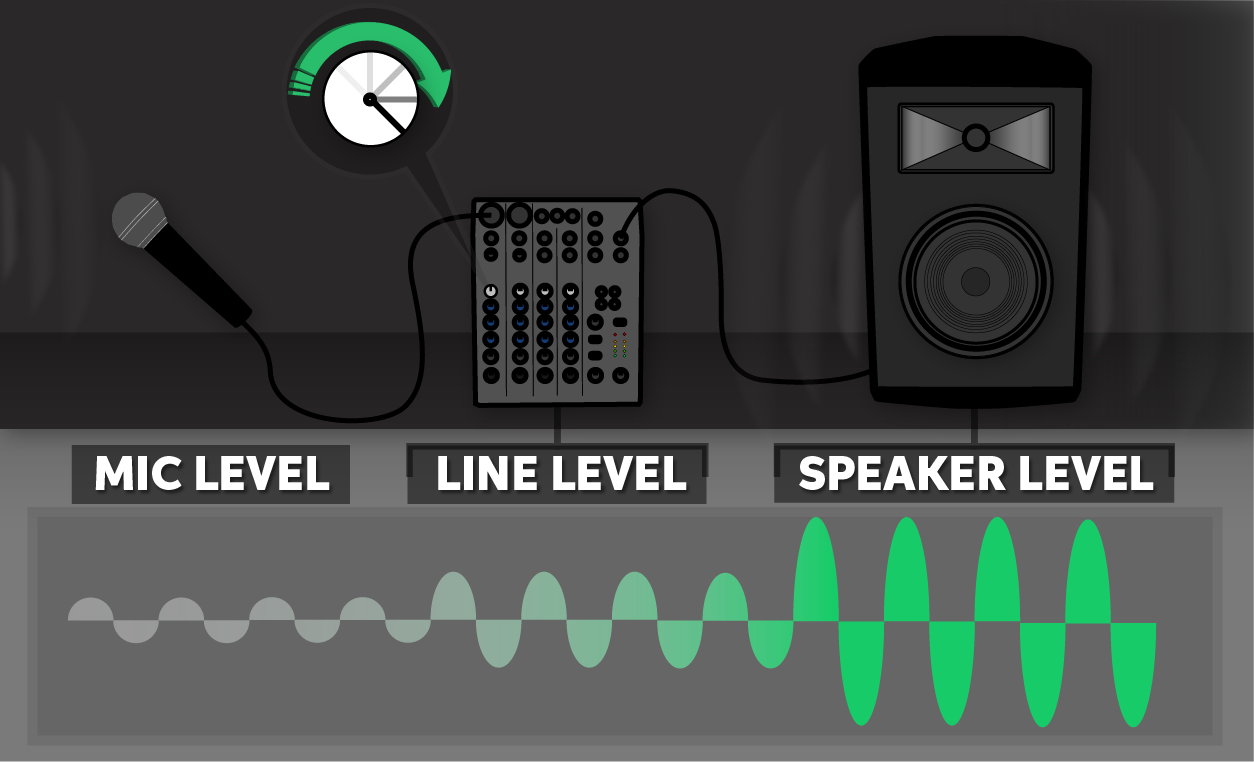
Microphone level is usually specified between -60 and -40 dBu. (dBu and dBV are decibel measurements relative to voltage). Due to the fact that mic signals will tend to be much lower compared to line-level, they will often require a “pre-amp”. This device can boost mic signals to line level without introducing electrical noise. This is just like electric guitars that need amplifiers to boost the signal.
Read more about Mic vs Line Signals
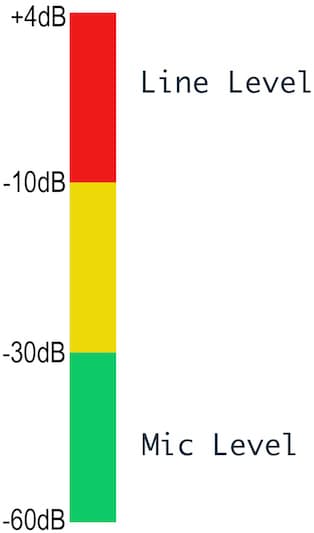
-10 dBV for consumer equipment (like MP3 and DVD players)
+4 dBu for professional equipment (mixing desks and signal processing gear)
Preparation
Different sources will require different approaches to capture sound. Acoustic sources need microphones to capture sound. Electrical instruments can be directly connected.
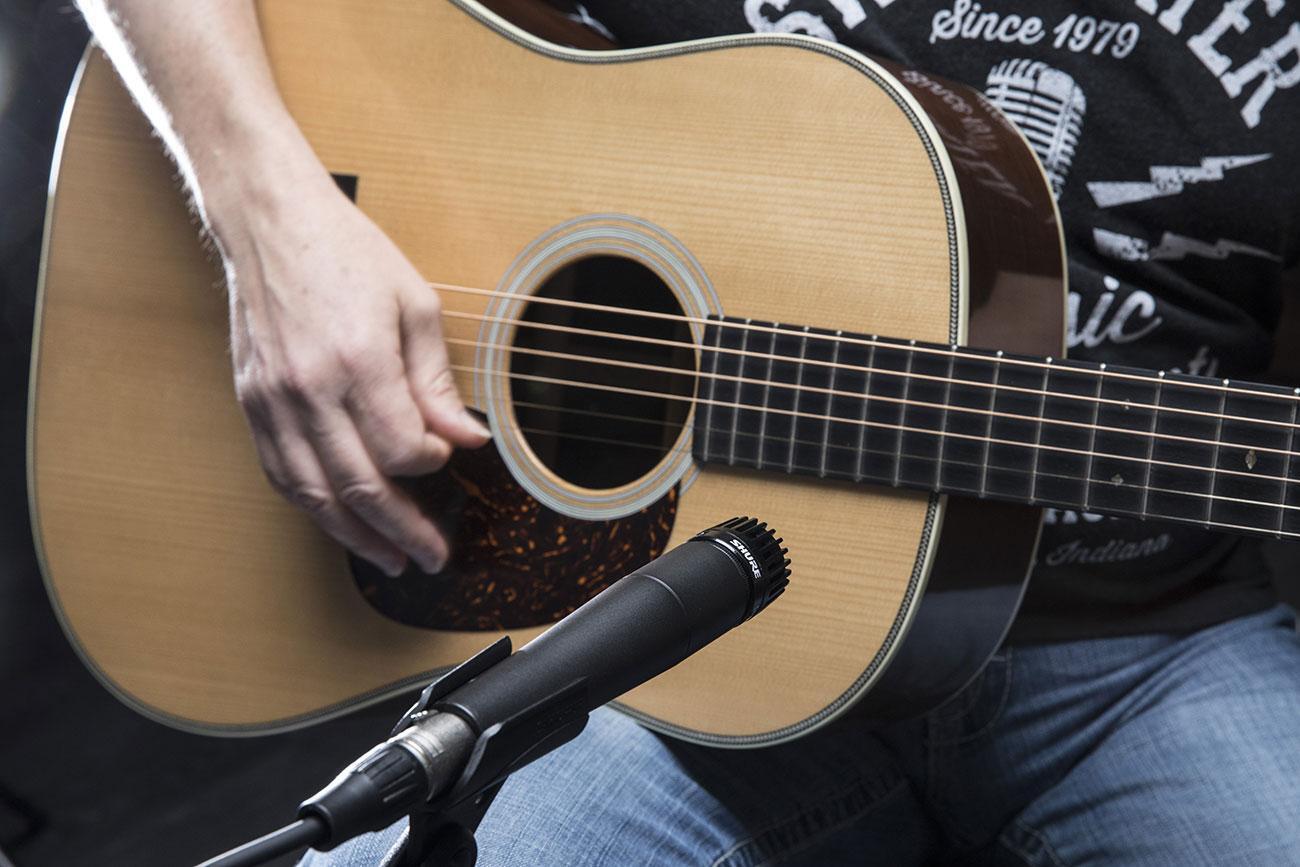
Acoustic Sources
Generally, a microphone will be placed at a close distance to the source using a mic-stand. You want to mic the sweet spot directly or positioned elsewhere in the room capture the natural reflections or ambience of a space.
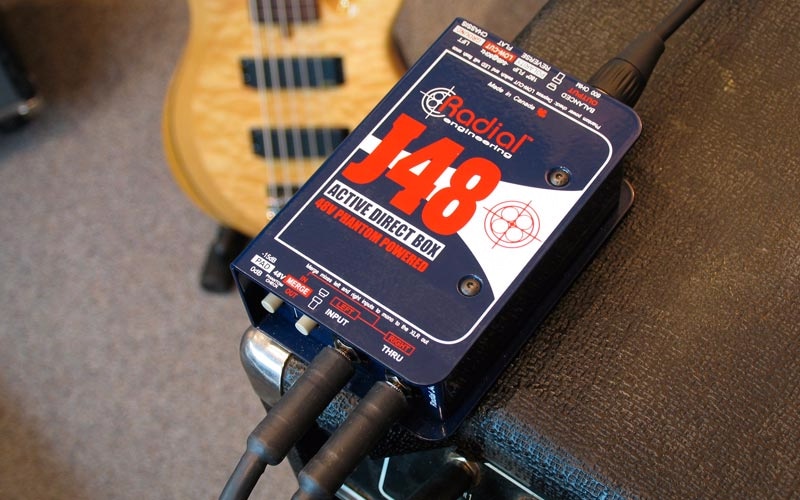
Electric Sources
Electric instruments, such as the bass, may require a “DI Box” in order to amplify the signal. Similar to how a guitar amp boosts the electric signal for the speaker. In this case the DI will take a direct bass or guitar signal , without an amp, to be ready for mixing.
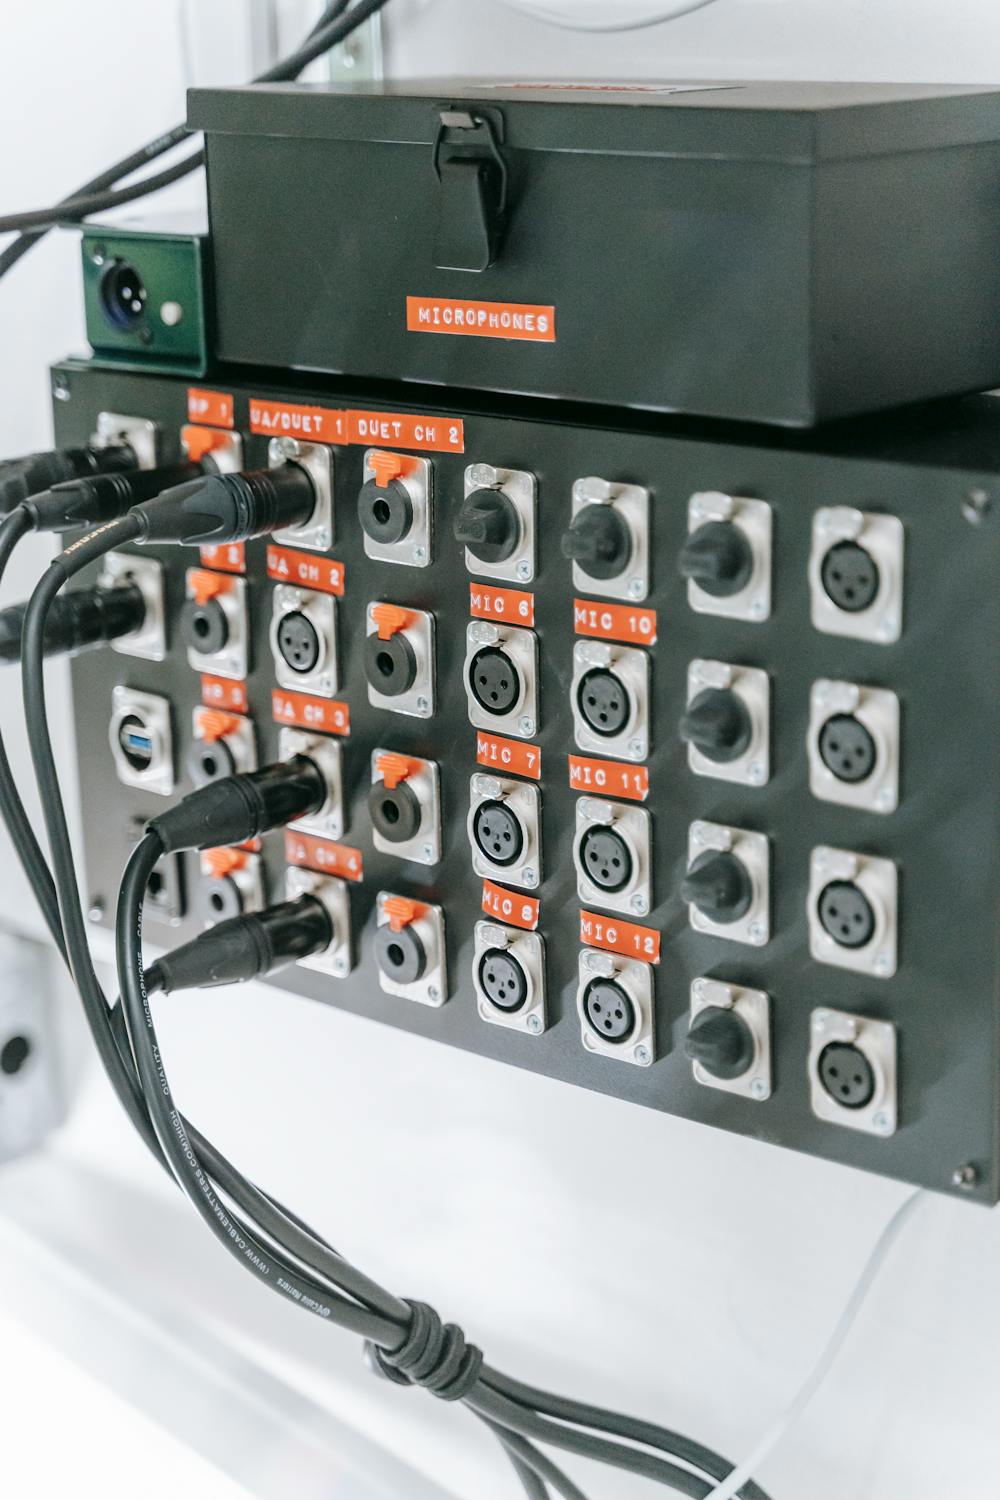
The Mic Panel or Snake Cable
The source signals need to reach the mixer. However, in an ideal scenario, the microphones and instruments are not directly connected to the mixer. They would be connected to a “Mic Panel” or “Stagebox”. This is a multi-port panel that bridges signals to and from the mixer. It also serves extension cable when there are great distances between the microphones, mixer and speakers. The “mic panel” feeds signals to and from the control room. The labels on the panel indicate what channel the signals feed into the control room. By default the mic signals should reach the corresponding input connections on the mixer.


Conclusion
Preparing any session for capture requires knowledge of signal flow of included sources and destinations. With everything set up correctly, the signals being captured will be ready mixing.